Connect to the CAM VPN
Please see instructions on how to configure your Pulse Secure to connect to the CAM VPN by using the following tutorial: CAM VPN
 Map a Network Drive (Windows)
Please Note: Depending on your version of Windows, images or text used in the tutorial may appear different on your own personal computer.
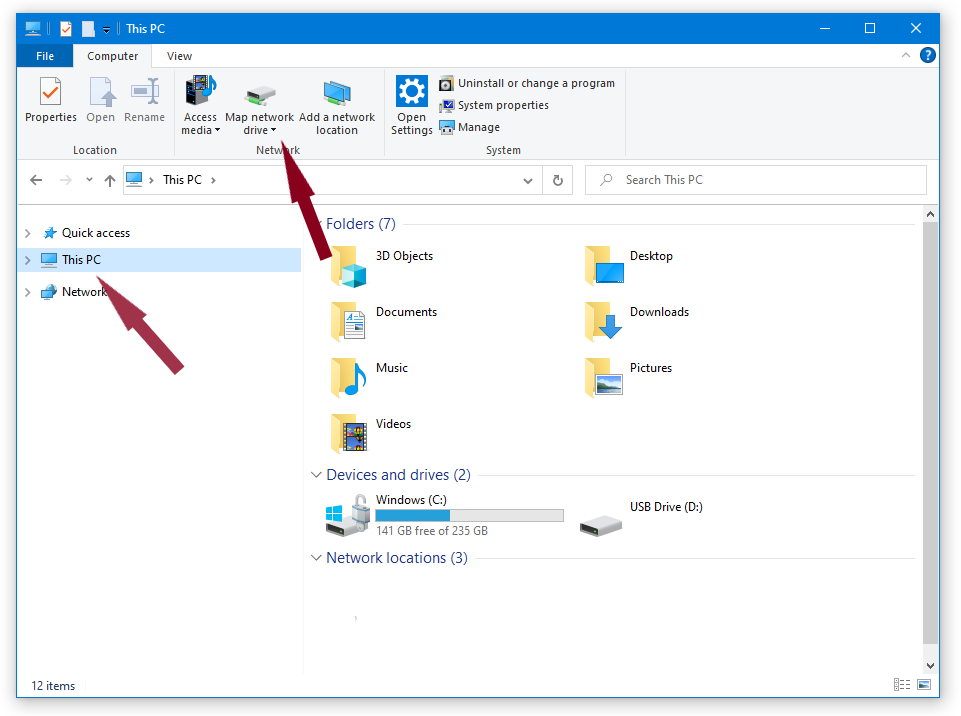
1. After connecting to the CAM VPN, open a File Explorer window.
2. On the left-hand column, navigate to “This PC” (on older systems this will be “My Computer”).
3. At the top of the window, select the “Computer” tab, and then click on the “Map network drive” button.
4. In the Map Network Drive window, you can enter the following information:
-
- Drive: Pick a letter that is not currently in use.
- Folder: Enter the path to your desired directory. This information should be in your initial account email, and can be requested if you do not know the path.
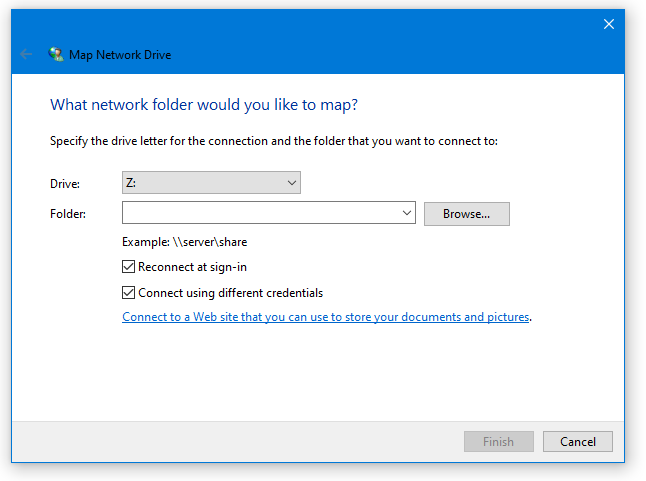
5. Ensure the check boxes next to Connect using different credentials or Reconnect at sign-in are selected.
6. Click Finish
7. You will then be prompted to enter your credentials. Select the option to use another account/another credentials.
8. Then, enter your CAM username as: cam\username and enter your CAM password.
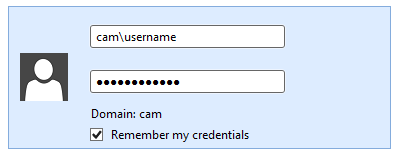
9. Select OK
 Connect to a Server (Mac)
1. On your keyboard, select the command key and K (⌘K) to open the Connect to Server… window.
2. Enter the full smb:// address for the directory you would like to connect to. If this is a home or lab directory, this information should be in your initial account email.
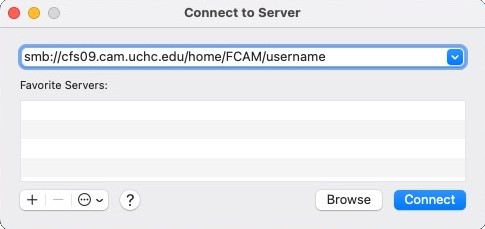
3. Select the “Connect” button.
4. A login window will appear. If you do not see one, the window will sometimes hide behind other windows. Minimize other windows to locate the login window.
5. Enter your CAM account username as cam\username and enter your CAM password. You have the option to select the checkbox next to Remember this password in my keychain.

6. Select “OK”.
7. The network drive will now open in it’s own window.
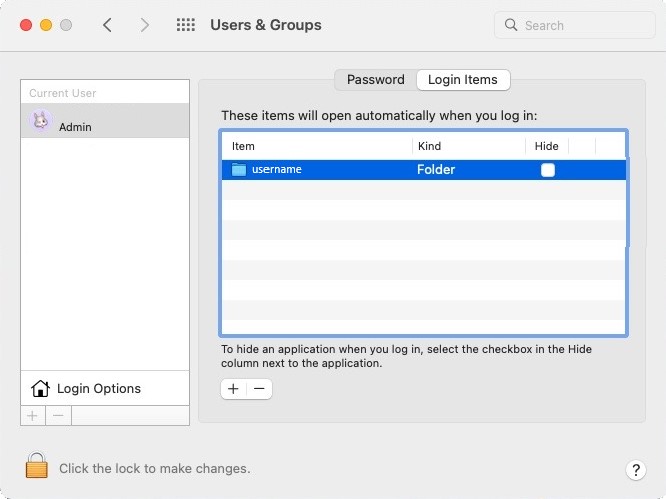
Auto-Mount Network Drive on Startup
Mac OS will not automatically mount the network drives unless specified.
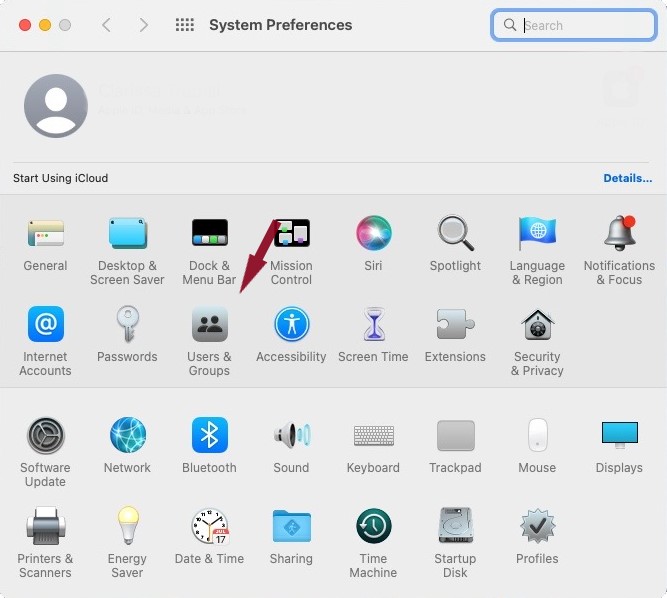
1. Select the Apple icon at the top-left and then select System Preferences.
2. Then, select Users & Groups
3. Select your Mac Account name, and then select the Login Items button on the right. Then, select the + button.
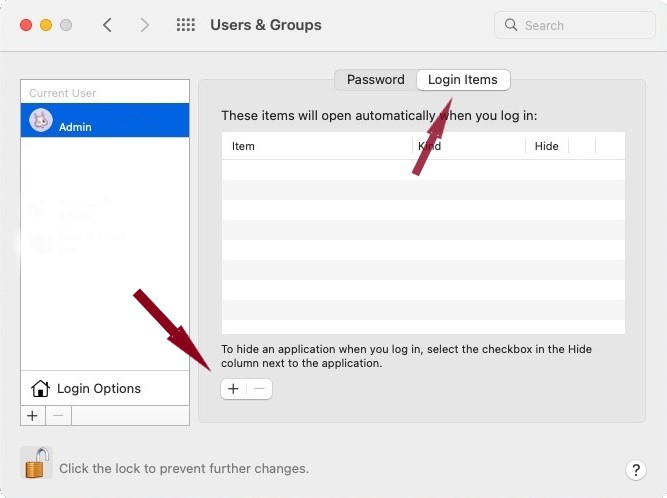
4. Find the mapped drive on the left column – you may need to navigate to your exact home directory folder if it does not appear for you. Then select “Add”. Your folder will now appear under the Login Items in Users & Groups.